Friday 28 February 2014

Friday Finish: Wonky Pods (TGIFF)

Hello!  This week I'm hosting TGIFF, so if you're here because of that then thank you so much for stopping by.

This week I'm sharing a special finish with you - a quilt for my youngest daughter, who will soon be moving into a big girl bed.  The quilt is my own design and was heavily inspired by some of Elizabeth Hartman's work, in particular this quilt


I love that it's a girl's pink quilt, without actually being overly pink.


The blocks are made using a wonky cut layout I came up with last year, after playing around with a charm pack.  At the time, I knew I wanted to float them randomly across a quilt top.


I wanted something with a lot of negative space that I could meander over, I have wanted to FMQ an allover meandering pattern for a little while now, and I am really pleased with the result.
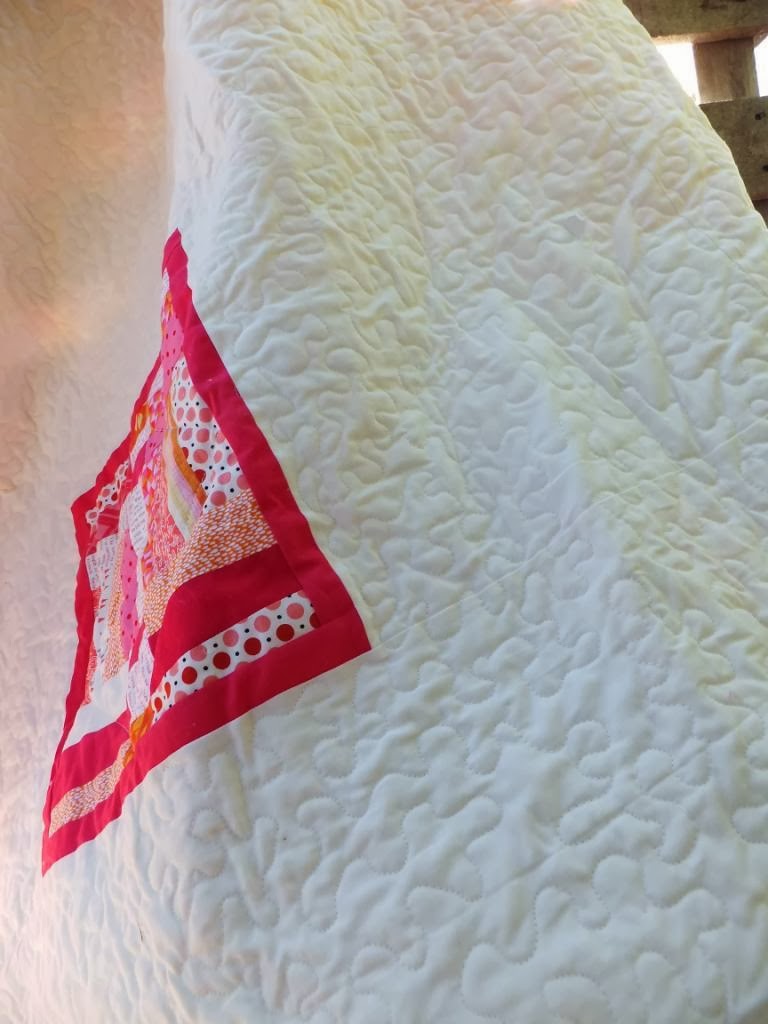
Meandering detail
 

The back is a vintage sheet.  The batting and binding fabric were purchased specifically for this project, everything else came from my stash.


QUILT STATS:
Finished Size: 56" x 85"
Pattern: Wonky Pods - available in my Craftsy store
Fabric: a "curated" charm pack from my stash, Moda Bella Azalea for the pod borders, Moda Bella Ivory for the background.
Backing: vintage sheet (100% cotton) from my collection
Binding: Michael Miller Ta Dot
Pieced and Quilted: By me, on my domestic sewing machine- my first time FMQ meandering!

Thanks again for stopping by, now why not link up your own finishes?  I will also be linking up to Crazy Mom Quilts and Confessions of a Fabric Addict, Sew Cute Tuesday and Fabric Tuesday.


Thursday 27 February 2014

Winner: Sunday Stash

The winner of our recent Sunday Stash giveaway was linkup no 22, which is Julie from Quilty Sewing:


There were 56 comments and 26 linkups - which is a total of 82 entries.  I allocated 1 - 56 to the comments, 57 - 82 to the linkups.

Have a great week!

Wednesday 26 February 2014

WIP Wednesday: February wrap-up

Last Wednesday of February, which means Spring is ever so closer for many of you, for us it means Autumn will soon be making it's presence felt.  I've got an awful lot on the go at the moment - here's a quick round up.

The girls and I dug up the last of our Rocket potatoes this morning, this is our haul from the four plants that were still in the ground:


Most days we get 6 eggs, they are usually still warm when I collect them, they all lay in one nesting box, even though there are 4 boxes to choose from! 


In the studio, there are many things in progress - taking priority is my entry for the Radiant Orchid challenge, I told myself I wouldn't give out any sneak peaks, to try and capitalise on the wow factor, but I can't talk about it and not show something, so here is a little snippet:


Scraps 101: we've got a guest post coming in the next few days, so stay tuned for that.  I'm currently trying out some things with selvedge scraps, so far I've sewn them onto some cardstock, and I think I'll slice it up and make some improv style cards with it.


I've got two bed-sized quilts in progress and two new patterns to go with them, one of them is for Pepper-Mae using the lovely Charley Harper fabric:


Also, in January I set a goal of completing a set of 4 improv pieced placemats - I haven't finished them, but I've got 5 of them pieced (made an extra one), here's a peak at them:


Finally, there's still time to enter our current giveaway - so check it out.

Linking up to:
WIP Wednesday at Freshly Pieced 

Sunday 23 February 2014

Sunday Stash: There were tears (and a GIVEAWAY)


Welcome Glitterati!

I'm so honoured to be hosting Sunday Stash for Ms Sparkles this week.  I've decorated the blog header especially for it - what do you think? 

This week I'm sharing my stash of Charley Harper from Birch.  When this arrived in the post, there were tears - I had hayfever at the time and my eyes were streaming but, you know, it could just as well have been because of the fabric too, it's so beautiful.  I have cut into this already and am part way making through a quilt for Pepper-Mae (my youngest).


Most of my Charley Harper stash came from the lovely Lela at Cedar House Fabrics, have you browsed through Lela's fabric lately?  Some lucky person will be able to buy some of that beautiful organic fabric for themselves soon!  As part of my Sunday Stash hostess duties I'm having a giveaway - everyone who leaves a comment here will go in the draw to win a $20 Cedar House Fabrics gift certificate.


To enter the giveaway, leave a comment here letting me know how the weather is in your part of the world.  The giveaway is open to anyone who leaves a comment, regardless of where you live and regardless of what the weather is like in your neck of the woods.  You'll also get an extra entry for linking up to this edition of Sunday Stash.  The giveaway is open until Thursday 5pm (NZ time).

Here's the rules, as decreed by Ms Sparkles:

Wednesday 19 February 2014

Fixing FMQ bloopers

I recently free motion quilted an entire bed-size quilt, this was quite a leap as previously I had only free motion quilted either practice pads or these bowls.  I quilted it in a mostly all-over meandering and ended up with a few "whoops" that I needed to fix.  On other things I've quilted I have thought to myself "I'll fix that at the end" and then haven't been able to find the bits that needed fixing, so this time I thought I'd mark the bits that need fixing by putting a bit of washi tape through some basting pins, so once I move a little away from the blooper, I put in a washi-ed basting pin and then carry on my merry way.


Once I'd meandered my way over the whole quilt, I went back and fixed things one by one.  Here's an example of how I fixed some of them.

1. Find the problem

2. Redo the quilting, making sure you stitch over existing quilting to lock the stitches

3. Unpick the original stitching

The repair doesn't look perfect (I'm still an FMQ beginner!) but it's only noticeable in the photos, when viewing the quilt in its entirety it would probably take me quite a while to find the repair.

What do you do with quilting that needs to be redone?  Do you fix it at the time or do you fix it later?  How do you mark the bits that need fixing?

Linking up to:
WIP Wednesday at Freshly Pieced
I Quilt at Pretty Bobbins

Scraps, rubber stamps and an inkpad: Scraps 101

I used some scraps leftover from my mum's quilt to make a label for my basting pin jar ...


My husband drilled a hole in the lid so I can add pins without having to take the lid off.  This also doubles as a fantastic toy for any toddlers you may have lurking around your sewing room.

I also made some reusable block labels at the same time.  Previously I used scrap pieces of paper with a number scribbled on them pinned to quilt blocks to keep track of them, now I've got these reusable block labels - much better for my pins and of course they look much more impressive in my WIP photos!


I also made some block labels using a marker, which was much quicker than stamping it. What do you use to keep track of your quilt blocks?


These are project 26 and 27 of Scraps 101.


Linking up to:
Let's Bee Social at Sew Fresh Quilts
Really Random Thursday at Live a Colorful Life
Related Posts Plugin for WordPress, Blogger...