Monday, 11 February 2019

Bec's Quilt {the back}

I found this vintage fabric in an op shop years ago (I think its intended for curtains maybe, because it is quite heavy, and has a more open weave than quilting cotton) and decided to use it as the basis of colours for the back of Bec's quilt.


So I basically pulled all my fabrics in colours that would look right at home in a baby's nappy and went from there!

Monday, 4 February 2019

Bec's Quilt {the front}

Recently I finished this quilt for my sister for her 40th birthday.  Its a little late, she's about to turn 41 - but better late than never, right?


Monday, 14 January 2019

Chunking - New classes!


Exciting news - this year I will be teaching a new class at the Timaru Sewing Centre.  I'm really excited to be teaching patchwork classes again.

Monday, 15 October 2018

Ohio Star Quilts and the perfect binding


Recently I finished the second of the #milaandcuatroOhioStar quilts I have been making for my daughters.  When Ruby saw her one finished she exclaimed ecstatically:

Monday, 14 November 2016

Fishing for Geese: a baby quilt


When I first started making quilts I would see photos of gorgeous baby quilts that people had made and I would think "Wow, has this person ever spent any time with a baby? Don't they know that they poo, wee and vomit on EVERYTHING?"  Now I think, who cares - I'm not the one that has to wash it!  

Monday, 5 September 2016

WIP: City Samper and a Planning Sheet

Better late than never - almost 3 weeks in to the #100Days100Blocks Instagram sew-along I decided to join in ... and right from the first block I created (Block 20), I just couldn't help but rebel... Only one of the following 4 blocks was pieced strictly by the book.  Can you spot the rebellions?


This sew-along may just have helped me find my sewjo again.


Being late to the party means I need to do a bit of catchup, plus I have no time to sew on Tuesdays so I thought I would do a bit of planning and get the Tuesday blocks done ahead of time.  This means I'm doing the blocks all out of order and needed to keep track of which ones I've done ... so the planning sheet was born!  Born to be wild perhaps?

If you're interested in using this planning sheet, you can download it here (it's A4 - you may need to scale it):

Friday, 19 June 2015

How to Alter Colour of Black and White Handprints


One of my most precious momentos from our time with Mila are her hand and footprints, I have created a variety of things using her handprints, such as these ornaments, but I really wanted to be able to have colour versions of her handprints.


This tutorial uses wiidely available basic software and is intended as a guide for those who do not have the relevant experience to use Photoshop, Illustrator or similar software.  There are no doubt many other ways of altering the colour of your child’s black and white handprint, if you know someone who is a graphic designer they may be able to help you do this in a different way.  I use Firefox as my browser, and Windows operating system; this uses the website StencilGram (version as at 18 June 2015).

Follow these simple steps to alter the colour of your child's handprint ...

Friday, 22 May 2015

Learn Foundation Paper Piecing with the Tartan Kiwi!

*** THIS CLASS IS NOW FULL - If you want to be added to the waitlist please send us an email ***


Want to learn Foundation Paper Piecing from an expert?  Juliet (the Tartan Kiwi) is coming to my place (in Geraldine, South Canterbury) to teach a Foundation Paper Piecing workshop, on Sunday 28 June 2015, from 10am to 3pm, the cost will be $50.

Tuesday, 7 April 2015

The Morpheus Quilt

My brother, a deer farmer, recently got married.  This is the first family wedding since I started quilting so I was itching to make a quilt to give as a wedding gift.  I asked my brother who his all-time favourite stag was (Morpheus) and then designed the quilt based on a photo of that (now dead) stag.


Spot the flying geese


This is no generic, stylised stag's head.  This is a representation of an actual stag, one with a world record breaking set of antlers.  I wanted it to look like a stencil, and created a stencil based on a photograph.

Applique detail - ear and tag
The background is mostly 4" squares, with three points of interest provided by a plus block, some flying geese and a friendship star.  I wanted the background to be random, with no identifiable pattern.


When the quilt is on the bed the stag's head lies towards the foot of the bed.  It is quilted with horizontal wavy lines in the same manner as this and this.  The quilting caused me a lot of grief, with the amount of shifting that occurred.  I spent a considerable amount of time ripping out quilting, and then got to the point where I decided I'd spent enough time unpicking and that it was going to be gifted with more imperfections than I would have liked.

It was very well received and looks great in their bedroom.


Quilt Stats
Finished Size: approx 97" by 97"
Pattern:  Original design - raw edge machine applique stag's head on a low volume background
Fabric: Many, many different low volume prints (no solids), three red prints used for the applique. 
Binding: Mini Confetti dot in Scarlet by Dear Stella
Backing: Doe Wideback - Crisscross wideback in Graphite
Pieced and quilted by: me, on my domestic sewing machine.

This was my first time using 108" wide backing fabric, and I have to say I was disappointed.  I felt the fabric was very thin - is that normal for a backing fabric?  I had expected it to be the same quality as Kona, but it is much thinner.  Someone I follow on Instagram called it "lovely and soft", and I agree it is soft but for me that softness stems from the thinness of the fabric. Have you used 108" wide backing fabric before?  How did you find it?

Linking up to:

Sunday, 1 February 2015

Playing with Curves


Just when my husband had given up asking if I was ever going to finish a quilt for our bed ...


The main pieced section of this quilt is based on Brenda Gael Smith's Topsy Turvy quilt featured on the cover of the June/July 2014 Quilters Companion.  I used the pattern as a guide - I wanted to use only what I had in my stash so instead of using 1/2 yard of 8 fabrics, I used a 13 x 17" rectangle of about 16 different fabrics and followed the stack technique described in the article to make 16 blocks which were trimmed to 11" square (finished).  The smaller rectangular pieced section was made using the add-on technique.

Cover of June/July 2014 Quilter's Companion - source

The layout of the quilt is inspired by Rachel Singh's Wonky Cross quilt.


I quilted it in horizontal wavy lines, in the same way that I quilted my Princess and the Pea quilt, in an attempt to echo the improv curves of the piecing.


The binding was a compromise - this is a reversible quilt, and the other side has a totally different colour scheme, I had purchased a yellow Michael Miller Ta Dot to use as the binding when I finished the other side of the quilt so stuck with that in an effort to use what I already have.

Although I love asymmetrical compositions in quilts, I have come to the conclusion that I like symmetry on the bed, so the next quilt I make for our bed will feature a symmetrical design of some sort.

Quilt Stats
Finished Size: approx 85" by 80"
Pattern:  Combination of Topsy Turvy pattern and improv pieced  
Fabric: All solids - Kona Silver for the background, and a combination of orange/blue/white/grey from my stash.
Binding: Michael Miller Ta Dot in yellow
Pieced and quilted by: me, on my domestic sewing machine.

Linking up to:

Sunday, 11 January 2015

GIVEAWAY - Pay It Forward

So last May I was lucky enough to win a Pay It Forward from Molli Sparkles.  Part of the bargain was that I would host my own Pay It Forward and send something fabulous to three lovely readers within six months of receiving my prize from Molli Sparkles. Here is what I received in the post back in October ....


Beautiful.  And you know what, when I saw those cushions make their debut on Molli's blog I thought "oooh, I hope I get something like that as my Pay It Forward prize" - lucky, no?  Not only did I get two cushion covers and some washi tape but also a half yard of Floressence by Art Gallery Fabrics. 


Now it is my turn to repay the kindness - please leave a comment here if you'd like to go in the draw to be one of 3 people to receive something lovely from me, the catch is that the winners need to then hold their own Pay It Forward within 6 months of receiving my gift.  The giveaway will stay open until Sunday, 18 January 2015 (NZ time), I will then randomly choose three winners (assuming more than three people enter the giveaway). 

NOTE:  the photos in this blog post are what I received from Molli Sparkles, 
NOT what I am giving away - the giveaway prize is a surprise!

Burda Style 9494 (View B)

If anyone is interested in participating in a Pay It Forward this year, hop on over to this blog post, I'm about to get busy making something fabulous to send to three lucky people! 

Two dresses for Ruby and one for Pepper-Mae, using View B of Burda Style 9494.


I'm not really happy with how the pattern handles the ends of the zipper at the neckline, although after making three dresses I now realise it may actually be my interpretation of the pattern and I might try a slightly different approach next time.


I like to get maximum value from any pattern I buy so I will no doubt make more.  I traced each pattern piece in 3 different sizes so that I could make the dress in multiple sizes.  The fit in the bodice is quite big on my girls, but they'll be able to wear them for a couple of summers.


And some matching hairties using scraps, which are project 32 and 33 of Scraps 101.


Linking up to:

Friday, 19 December 2014

The Princess and the Pea


This reminds me of all the mattresses stacked precariously one on top the other in the Princess and the Pea fable, hence its name.  I have wanted to do a stacked books or stacked coins (??) type quilt since seeing this one by Svetlana of s.o.t.a.k handmade.  The prints are 2 1/2" wide strips of varying lengths, all centred on a Kona snow background.


This is the back of my I Spy a Charm (Matilda) quilt.  I love the idea of double sided quilts - being able to change the look of the bed simply by flipping the quilt over.  It does have drawbacks though, namely having to choose quilting and binding that will work with both sides. 

Quilt Stats
Finished Size: approx 57" by 80"
Pattern:  improv pieced  
Fabric: Various prints, Kona Snow background.
Binding: Dear Stella Confetti Dots in orange with an accent strip in s yellow Kate & Birdie Paper Co Bluebird Park print
Pieced and quilted by: me

Linking up to:
Finish It Up Friday (Crazy Mom Quilts)
TGIFF

Friday, 12 December 2014

I Spy a Charm (the Matilda version)


Another quilt made using my I Spy a Charm pattern, this time using the Matilda collection by Alice Kennedy for Timeless Treasures and with alternating border colours (grey and orange) which gives the quilt a very different look from my Charley Harper I Spy a Charm quilt.


I made this quilt to be reversible so the quilting had to be something that was going to work on both the front and back.  These organic wavy lines gave the quilt great texture. 

It feels great to have this finished, it has been in the WIP pile for many, many months!

Quilt Stats
Finished Size: approx 57" by 80"
Pattern:  "I Spy a Charm" (available in my Craftsy store) 
Fabric: Matilda by Alice Kennedy for Timeless Treasures, with some Kate & Birdie Paper Co Bluebird Park print.   Background fabric is Moda Bella Bleached White, with the blocks framed in a generic grey and orange.
Binding: Dear Stella Confetti Dots in orange with an accent strip in s yellow Kate & Birdie Paper Co Bluebird Park print
Pieced and quilted by: me

Linking up to:
Finish It Up Friday (Crazy Mom Quilts)
TGIFF (hosted by Quilt Matters)

Friday, 3 October 2014

The Harlequin Pillow


I am really into random at the moment, I think it adds interest to a piece because people need to look for just a little bit longer while their brains try to find a pattern.  With these randomly placed HSTs, I focussed on the dark blue while determining the layout - ensuring the dark blue was evenly (yet randomly) distributed.  Straight line quilting radiating out from the hour-glass centre - the colours of which make me think of a harlequin, hence the name.


Linking up to:
TGIFF
Finish it up Friday
Sew Solid Sunday

Monday, 29 September 2014

Around the World Blog Hop

I was tagged by Carol of Happy Turtle in the Around the World Blog Hop, so here is my stop in all its glory.

What am I working on? 
In the studio there's not a lot happening at the moment, sadly.  There are a few reasons for this: 1) our forest garden, 2) my sewing classes and 3) sick kids.
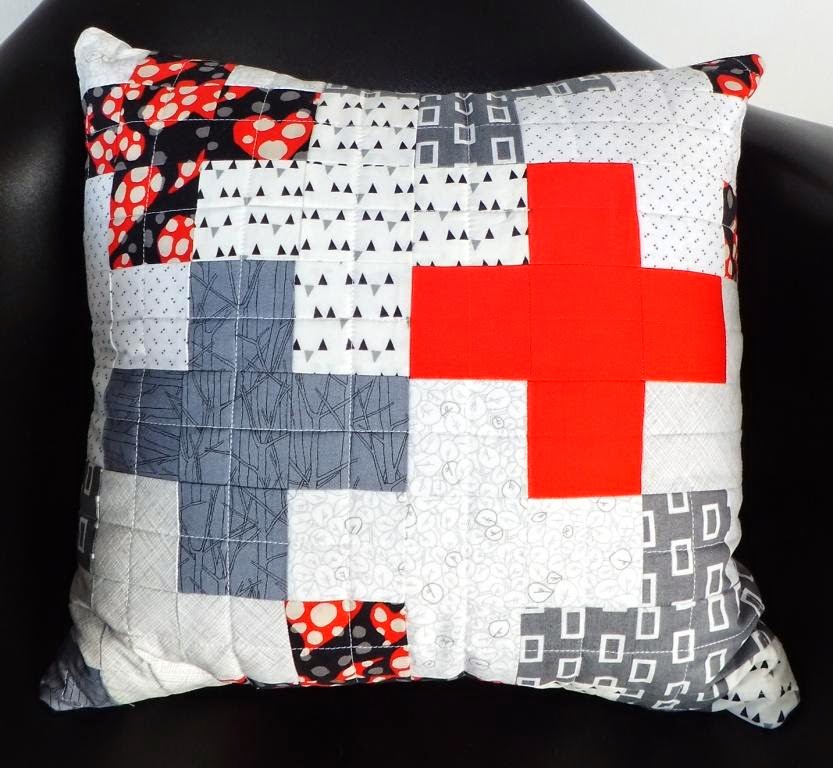
One of my few WIPS - random HST cushion cover
1) Our Forest Garden
We are in the very early stages of planting/building/creating a forest garden.  The forest garden is designed as a whole system, so all plants (trees, shrubs, ground covers, etc) each have a role to play in either supporting the system or providing edible crops.  It will ultimately reach a point where it is self fertile (hopefully).  We fenced off an area of about 1100 square metres in our paddock, and are currently planting the bulk of the canopy layer, which is primarily fruit and nut trees, and some native nitrogen fixing trees.  We have heavy clay soil, so we hired a digger and dug HUGE holes for the fruit and nut trees, and then added lots of compost, rotted manure, roadkill, sand, gypsum and other lovely things all with the intention of improving the soil.  And by "we", I mean "me".  My husband drove the digger and I've been the one doing the hard labour to fill in the holes and plant the trees. 


Don't be fooled into thinking I know what I'm doing - I don't.  I bought a book, I read the book, I have a dream.  Now I'm moving barrow loads of dirt around our steep paddock.  And loving every minute. I have grown vegetables and berry fruit on a very small scale for over a decade now, and I have long had a dream of growing edible crops on a self-sufficient scale.  It is very exciting to be making that dream a reality. 

2) My sewing classes
The classes and workshops I offer are run from my home studio, I like my studio to be tidy at the start of a class, and as I am not a tidy person by nature I have found myself not wanting to start new things when a sewing class is coming up for fear of having to clean up after myself.  One of the classes I'm currently developing is a crazy piecing class, the WIP below will eventually be a class sample (yet another cushion cover probably).


How does my work differ from others of its genre? 
I wouldn't say I have a unique style, I make what I feel like making.  In terms of quilting style, I consider myself very definitely a Modern Quilter.  Negative space, asymmetrical composition, bold colours, lots of solids, minimalist, improv.  I love improv.  As far as I'm concerned I was born to improv.

Why do I write/create what I do? 
Well now here is where I may be a bit different.  After my daughter died, I found myself being drawn (even more so than before) to handcrafts.  The act of making something with your hands, I believe, is very beneficial at a number of levels.  I feel very strongly that a creative outlet can support those of us who have experienced profound grief as we adjust to life after loss.

Oh, you're still reading.  Thanks so much for sticking with it.  I am tagging the lovely Liz from Shush, I very much enjoy following Liz on Instagram, her posts have personality, she likes to share photos of good looking men (#shushhottie - most of whom I've never heard of as we don't have a TV), she makes magnificent sew together bags and she's a little bit crazy.  If, god forbid, you've never checked her out then I suggest you do.

 Linking up to:
WIP Wednesday

Friday, 29 August 2014

Teddy Bear sleeping bag

Recently I had fun whipping up a quilted sleeping bag for a teddy bear, inspired by a Flossie Teacakes pattern, although I didn't buy her pattern and made it from memory, so it actually looks quite different.  I made one using scraps left over from my Vintage Improv quilt, then of course I had to make another one because I have two children and they are still learning how to share.


I like the look of curved edges but didn't want to make bias binding because it just seems like such an inefficient use of fabric, so I used cross-grain binding and I'm happy with the finish (seeing as they are just play-things for my kids).  The binding on the back of the curve has a couple of little tucks in it, which you can see below - I machine stitched the binding and had to do the curves a couple of times, so the stitching is a bit messy, but my kids don't care!

Curved binding from front
Curved binding from back showing tuck in binding

Both of these are made almost entirely from scraps, including Frankenstein batting (I cut the Kate Spain binding from yardage, otherwise everything came from scrap bins) so these are projects 30 and 31 of Scraps 101.

Loving the improv low volume background on this one

In other news, I have recently succumbed to the charms of Instagram, you can find me here - I'd love for you to come and say hello!

Linking up to:
Finish It Up Friday

Friday, 1 August 2014

Plus Cushions (aka Cushion Crazy Part 3)

I have started offering modern patchwork and quilting workshops from my home studio, the first of my workshops is called "The Plus Cushion - An Introduction to Modern Quilting".  Here are some samples I put together for the workshop.


The workshops are aimed at people who have never dabbled in patchwork or quilting - no sewing experience is required, and you don't even need to own your own sewing machine, as I have student machines available.  The workshop is held over weekend (with two four hours sessions) and creates this simple yet striking quilted cushion cover.

This next cushion, which to me is the most striking of the three, was made by one of my first students.  I was so pleased with how this finished, the woman who made this has not sewn since school and doesn't own a sewing machine - look at what she created, isn't it fantastic?


If you live in Canterbury, or even North Otago, and are interested in learning the basics of modern quilting, why not come along to one of my workshops?  Further details can be found on my "Workshops and Events" page.

Linking up to:
Finish it up Friday

Friday, 11 July 2014

Wonky Pods - the lap quilt edition


Another quilt made using my newly released Wonky Pods pattern, this time I used a strip piecing technique to create random/crazy pieced blocks without borders, and substituted these for the wonky cut pattern blocks.  The quilt finishes up at about 56" x 57" so is a great lap/throw size.  It uses a mixture of prints from my stash - Botanics,  Mormor, Alison glass text prints ... and a few others.  I find when creating crazy pieced blocks it's good to have at least 10 fabrics - preferably more.


I FMQed it in an all-over meandering, I love the texture and how it crinkles after washing, this is definitely my current go-to quilting style.


It is backed with a vintage sheet.


If you're interested in making one of my patterns, they are all currently marked down 25% to celebrate the release of my Wonky Pods pattern and I Spy a Charm pattern.

Quilt Stats
Finished Size: approx 57" by 56"
Pattern:  "Wonky Pods" (available in my Craftsy store) 
Fabric: Various.   Background fabric is Kona Snow. 
Backing: Vintage sheet.
Binding: Fanfare (from Spotlight)
Pieced and quilted by: me

Linking up to:
Finish it up Friday
Related Posts Plugin for WordPress, Blogger...