Recently I had a vintage linen swaparama with Hazelnutgirl, this is what I got: (forgot to take photo of what I swapped)
And this is what I've done with it - a skirt for Ruby, so cute, wish I had more of this fabric now!
And some bibs, which are now for sale in my Felt store.
Sunday, 31 July 2011
Wednesday, 27 July 2011
Mariposas (take 2)
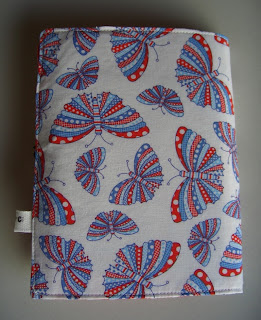
I liked the fabric combination in the skirt I made recently so much that I wanted to make something else with it - and here is that something:
A colouring wallet, very similar design to the vintage farm scene one I made (and sold) a while ago, but with fabric pockets instead of felt. It has 12 crayons and an A6 memo pad, a big pad with 100 sheets. I think the pockets would probably also hold those half size coloured pencils as well, but need to double check that.
The black crayon was misbehaving, non-conforming, but I didn't realise 'til after the photo shoot.
This is now for sale in my Felt store.
Sunday, 24 July 2011
Mariposas
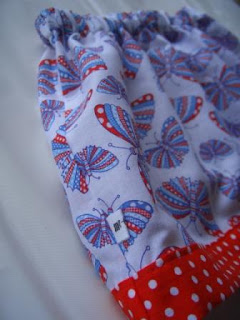
One of Ruby's friend's turns one a couple of weeks after her. The invitation to her party has butterflies on it and I found this cute fabric at Spotlight - patchwork butterflies:
Which I then turned into this:
I remembered a label - but only because my husband reminded me just as I was about to sew up the sides:
Which I then turned into this:
I remembered a label - but only because my husband reminded me just as I was about to sew up the sides:
Chalk it up! (Part 2)
I've been playing around with chalkcloth again and getting in some more practice with zips - the result is a chalk cloth pencil case.
You'll be seeing a lot of zips here in the future. I ordered a whole bunch online from kandcsupplies, let's not dwell on exactly how many zips I purchased, suffice to say that I may never get through them all. And because I am impatient, I bought some off trademe to tide me over until my US order arrives. All this adds up to lots of zips. I see many people getting pencil cases, pouches and other zippered parafernalia as gifts in the future.
This one is now for sale in my Felt store. I think it looks great just on it's own, without the chalkiti (chalk graffiti) - it reminds me of a licorice allsort (black with a pink centre). You can use chalk markers on it too, these can take a while to dry off completely but give a finer (and longer lasting) finish.
Friday, 22 July 2011
The Deli Bag
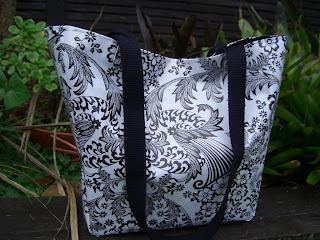
Introducing ... (drum roll please) ... the Deli Bag!
Why 'the Deli Bag'? One day a few weeks ago I was at the supermarket and saw a lady carrying a bag that I liked the shape of, this is my interpretation of it, she just happened to be walking past the Deli section when I saw her (or, more accurately, saw her bag).
This is made out of black lace oilcloth (that I got from Oilcloth Addict), lined with black quilting cotton and fastened with a magnetic snap fastener, it has a pocket on the inside. If anyone else in NZ is wondering how they can get their hands on magnetic snap fasteners, I got mine from Stitchbird. I'm also wondering if Patchwork Passion sells them, based solely on something they mention on their website (I've never been there).
The bag and I went for a tour of our property trying to get a good shot of it, it's windy outside and it kept blowing over so the photos weren't all that successful. The good thing about oilcloth, though, is that you can wipe it clean with a damp cloth, which is great if you put it down on the boggy ground (such as the ground all over Auckland). Here are a couple more photos so you can oogle it:
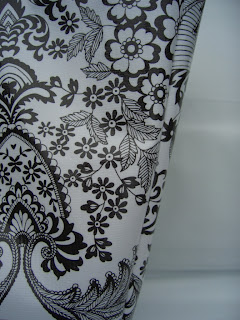
Here's one for the fabric addicts out there, oilcloth in all it's loveliness:
I'm a little bit frustrated with the whole tension thing - I did a practise run on a scrap and the tension seemed fine, while sewing the oilcloth outer it seemed fine, but then when sewing the lining and outer together the tension turned to custard - am I supposed to adjust the tension when I put the two different types of fabric together?? This bag was made by placing one bag inside the other and then stitching around the top, which is how I make the market bags, but for the next bag I think I'll follow the assembly instructions for this bag, albeit not the dimensions.
I even remembered to sew in a label, which I usually forget to do.
Sunday, 17 July 2011
Overcoming my fear of zips
I have been killing two birds with one stone lately - getting some practice working with oilcloth and overcoming my fear of zips. And getting through some of my pins on my 'things to make' board. So, actually, that's three birds.
The black polka dot oilcloth is my least favourite, so that's the one I'm doing the practising on. While working with it I'm almost yawning, can't wait to get to the Zoya, it's so bright and summery. Sorry about the glare in the photo below, it was sunny and oilcloth is reflective. A make-up bag, from this tutorial:
A pencil case, from this tutorial:
And then I felt like stepping things up a bit and making a lined pencil case out of laminated cotton. When my package arrived the laminated cotton was wrapped in some scrap pieces, which turned out to be enough to make a pencil case. So this fabric below wasn't actually one I ordered but seems perfect for a pencil case.
For this I used the dimensions from the pencil case tutorial I mentioned earlier, but followed instructions from Flossie Teacakes to get it lined. I also put those little fabric covers over the ends of the zip, which turned out to be a waste of time due to the length of the zip, all it did was add bulk to the corners of the pencil case - duh! Also, because you have to scrunch up the pencil case to turn it out the right way, the laminated cotton ended up crinkled, and ironing it is something to do only with great care, a very cool iron and a pressing cloth. Haven't attempted it yet, wanted to photograph it first in case I ruin it.
Friday, 15 July 2011
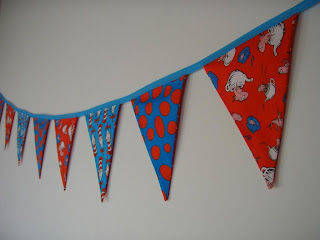
Ruby's Bunting
I finally managed to make Ruby's bunting out of the Dr Seuss fabric I bought on my recent trip down south (the practice bunting I made sold by the way - yippee!).
If I make more bunting I will do it a bit differently - I used bias binding as the tape but didn't fold it over on itself, I just sewed the flag to the binding, but this meant that I sewed the full length of the tape twice, which just provided too many opportunities for wonky sewing. Next time I will use some really wide bias binding and fold it over on itself, encasing the top of the flag.
There are 9 flags, three of each of these fabric:
So three sets of these:
The back of each flag is red polka dot, the bunting looks great on the back too (but the tape holding it all together doesn't, another reason why I should have done it differently).
This fabric (from Robert Kauffman) was such a nice fabric to work with, it feels so soft. I think I'm a quilting cotton convert.
Wednesday, 13 July 2011
More fabric?
That was what was written all over my husband's face when I got home from a quick trip to Spotlight on Sunday. I needed some fabric to match the laminated cotton, oilcloth and Dr Seuss fabrics I got a while ago. A note of caution: the red in the Cat in the Hat range is pretty tricky to match. The best I could do was match it with the red polka dot in the photo below.
Whipped up a skirt for Ruby out of the blue/green spotty fabric, too cute! Let's hope it still fits her come summertime (it's winter here).
Whipped up a skirt for Ruby out of the blue/green spotty fabric, too cute! Let's hope it still fits her come summertime (it's winter here).
Monday, 11 July 2011
Pinterest: one down, many to go ...
I have managed to make something from my 'Things to make' Pinterest board. Little matchbook notepads.
Envelope Templates
Things have been a bit barren on the blogging front for me over the last week or so. I've been preoccupied with other things, one of which was making the invitations for Ruby's first birthday party. For some invitations I made my own envelopes and thought I'd make some templates available for anyone else who wants to make their own envelopes.
There's all sorts of things you can make custom envelopes out of: scrapbooking paper, coloured paper, foreign newspapers, magazines, old childrens books, old encyclopedias, old music scores ... the list is endless. Yes, this isn't new, lots of people do it, I know. Here are a couple I've made recently:
The one above is from an edition of El Pais (Spanish newspaper) from a couple of years ago. The one below is from a Brothers Grimm storybook I got from an op shop, this is from the Iron John story.
If you are going to use the templates there are a couple of important points:
- please first measure inside the fold lines (the dashed lines) to make sure it has printed out the correct size, I wrote the dimensions on two of them (if you can read my scribble), for the one without measurements maybe check an A6 piece of paper fits within the dashed lines.
- you'll need your margins to be as narrow as possible for the C6 templates.
Subscribe to:
Comments (Atom)


